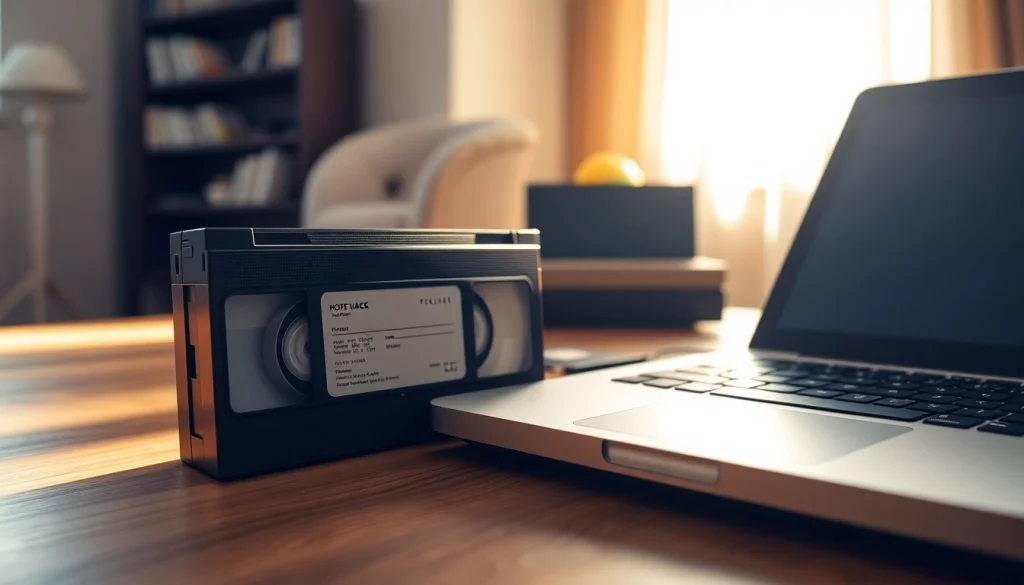
Understanding the Importance of VHS to Digital Conversion
As we progress further into the digital age, many precious memories captured on outdated formats like VHS tapes risk being lost forever. The urgency of VHS to Digital conversion is not merely about adopting modern technology; it’s about preserving cherished moments for future generations. Converting analog formats to digital not only helps maintain the quality of these memories but also improves accessibility and longevity.
Preserving Cherished Memories
Vintage videos often hold sentimental value, containing family gatherings, weddings, or childhood milestones that cannot be recreated. The conversion process encapsulates these moments, ensuring that they can be enjoyed time and time again without deterioration. With improved digital quality, users can share these memories through social media or even incorporate them into new projects, facilitating a deeper connection with the past.
Common Challenges in VHS Playback
Many people experience challenges with playing VHS tapes, stemming from both the physical degradation of tapes and the scarcity of functioning VCRs. Magnetic tape can deteriorate over time due to exposure to heat, moisture, and simply age, leading to potential loss of imagery and sound. Utilizing a VCR that’s seen better days introduces further complications: the player’s internal components might struggle to interpret the faded signal or may even encounter mechanical failures, leaving viewers frustrated and unable to access their memories.
The Benefits of Digital Formats
Transitioning video content from VHS to digital formats presents numerous advantages. Firstly, digital files are much easier to store and manage, often requiring just a fraction of the physical space. They are also more convenient for sharing across various platforms and devices—enabling seamless accessibility. Furthermore, digital formats employ compression techniques and can be preserved without the worry of physical degradation, thus ensuring longevity. The shift to digital also facilitates easy editing and enhancement, allowing users to refresh or correct issues present in the original videotape.
Exploring Your Options: DIY vs. Professional Services for VHS to Digital
Deciding between a DIY approach and hiring professional services often depends on personal preferences regarding cost, quality, convenience, and technical skills. Both options merit thorough examination to determine which aligns best with your needs.
Choosing a DIY Approach: Equipment You Need
For the DIY enthusiast, embarking on the VHS to digital conversion process can be immensely rewarding. Essential equipment includes a working VCR, a suitable digital video converter (such as an EasyCap or similar device), and compatible software for video capturing and editing. Specifically, the converter translates the analog VCR signal into a digital format recognized by a computer. You will also need RCA cables, a USB connection, and powerful software like OBS Studio or Adobe Premiere for capturing and editing.
Many users find success with user-friendly devices that simplify the process, allowing for an enjoyable DIY experience that rewards perseverance with stunning results. However, be prepared to follow through on troubleshooting and tech issues that may arise, which can be time-consuming and require a certain degree of technical savvy.
Benefits of Professional VHS to Digital Services
Opting for professional conversion services often guarantees a higher quality result and saves time, particularly for those with numerous tapes or who lack technical competence. Professionals utilize advanced equipment to deliver top-tier video and audio quality, ensuring minimal loss of detail during the conversion process. They also handle all aspects of conversion, providing options for quality checks and backups, which alleviate the burden from users.
Professionally converted videos typically come with additional services, such as restoring color and sound or encoding in various formats suitable for modern devices. For many, the peace of mind that comes with entrusting valuable memories to experts outweighs the cost implications.
Comparing Costs and Quality
Cost can vary significantly between DIY and professional services. A DIY approach might face an initial investment of about $50 to $200 for necessary equipment, which can exceed these figures if opting for higher-end converters and software. Conversely, while professional services can be priced anywhere from $15 to $30 per VHS tape, they often reflect the quality of work being performed. Bulk discounts may be available, and for those with a significant collection, these offerings can provide great value.
Quality is another essential consideration. DIY conversion may yield satisfactory results for some, yet professionals often produce superior video quality through enhanced equipment and techniques. This is particularly true for older tapes that have suffered degradation, as professionals possess tools specifically designed to restore and preserve detail.
Step-by-Step Guide to Converting Your VHS to Digital
Gathering Necessary Equipment
To effectively convert VHS tapes to digital, ensure you’ve gathered all necessary equipment. This includes:
- A functioning VCR to play back your tapes
- A digital video capture device (often connects via USB)
- RCA cables for audio and video input
- Video capture software (e.g., OBS Studio, Elgato)
- A computer for storing and archiving digital files
With all equipment aligned, you’re positioned to begin the conversion process with confidence.
The Actual Conversion Process Explained
Begin by connecting your VCR to the video capture device using RCA cables. Plug the capture device into your computer via USB. Install and open the video capture software on your computer. Prepare your VCR by inserting the VHS tape containing your desired content and switching on the machine.
In the software, select the appropriate input option (usually USB or Composite), then click on “Record” in the software to start capturing the VHS content. Simultaneously, play the VHS tape on your VCR. The software should now be recording the video in real time.
Review the captured footage once completed, ensuring integrity and quality were maintained. Save the file in your chosen digital format and output resolution.
Troubleshooting Common Issues
During the conversion process, you may experience several common issues, such as poor audio or video quality. If audio is out of sync, ensure that the software settings are correct and that you are using a reliable capture device. For visual issues like jumpy footage or static, check the head of the VCR and clean it if necessary. The usability of adapters, converters, or different cables can also contribute to success rates; trying new configurations could yield better results.
Additionally, if you notice any signal distortion, ensure that all cable connections are tight, and consider trying a different VHS tape to determine if the issue lies with the tape itself.
Optimal Formats for Your Digital Videos
Understanding Different Digital Formats
Different digital formats serve various purposes regarding quality, space, and compatibility. Common formats for video files include .MP4, .AVI, .MOV, and .MKV. Each format has its advantages:
- MP4: The most versatile format, compatible across all devices and platforms while maintaining a balance of quality and file size.
- AVI: Known for high-quality video, but larger file sizes make it less practical for storage and sharing.
- MOV: Popular for Apple products, offering great quality but resulting in larger files.
- MKV: Useful for high-definition videos, supporting various codecs, but may not work on all devices.
Choosing the right format depends on user preferences and intended use. For standard sharing and storage, MP4 is frequently the recommended option.
Choosing the Right Storage Solutions
Once your files have been converted, consider how you store them. Options include external hard drives, cloud storage, and network-attached storage (NAS).
External hard drives offer portability and have larger capacities suitable for extensive libraries. Cloud storage, on the other hand, provides excellent accessibility which enables users to reach their files from anywhere with an internet connection, fostering easy sharing and collaboration.
Whichever method is selected, create corresponding backups to preserve collected memories against corruption or hard drive failure.
Preserving Quality During Conversion
Extra care should be taken to preserve video quality during the conversion process. Utilize high-quality capture devices and ensure that you’re recording in the best resolution available from your VHS tapes. Additionally, use efficient software that doesn’t compromise quality during processing.
Regularly monitoring the output during the conversion process will help catch any quality issues upfront. If degradation is noted, consider employing a professional service, especially for particularly valuable tapes.
Future-Proofing Your Digital Collection
Best Practices for Storing Digital Files
To ensure the longevity of your digital collection, adhere to best practices for storage:
- Organize files in a clear directory structure, with consistent naming conventions
- Utilize multiple storage mediums (e.g., external drives and cloud services) for redundancy
- Regularly check and refresh storage mediums to prevent data loss
- Backup files frequently, especially after significant edits or new releases
Establishing these habits will significantly reduce the risk of losing valuable videos throughout technological updates and changes.
Sharing Your Converted Videos with Family and Friends
Once your videos are digitized and stored securely, consider how best to share cherished moments with loved ones. Platforms like Google Photos, Dropbox, or dedicated family sharing apps allow users to create shared albums, streamlining the sharing process among family and friends.
For more personal interactions, consider creating compilations or highlight reels that can be presented during gatherings, enhancing the shared experience of these precious memories.
Staying Updated with New Technologies
The world of technology constantly evolves, and staying updated is essential for the continued assurance of your digital video collection. Check for updates related to software and hardware periodically; updated tools may enhance the quality of future conversions or offer new features that streamline the process.
Professionals often stay ahead by consistently refreshing their knowledge. Engaging in forums and communities can lend insights on the best equipment to use for VHS to digital conversion and other technological advancements opening realms of possibility for preserving audio-visual media.
You may also like
-
Maximize Your Links: The Comprehensive Guide to URL Shortener Tools
-
Enhancing Online Presence with an Effective URL Shortener
-
Simple Steps to Create Short Link and Enhance Your Sharing Experience
-
Maximizing Productivity with a Virtual Desktop: Features, Benefits, and Best Practices
-
An In-Depth Look at Ubiquiti: Network Solutions for Modern Connectivity