Understanding Common Dryer Problems
As a household essential, dryers play a pivotal role in our daily routines, yet they are often overlooked until they malfunction. Understanding common dryer problems is key to maintaining your appliance and ensuring it operates efficiently. Recognizing the signs of dryer malfunctions and knowing how to address them will save you time, effort, and money. If you’re experiencing issues with your dryer, our comprehensive guide will provide you with the necessary insights for effective dryer repair.
Identifying Signs of Dryer Malfunction
It’s crucial to identify early signs of dryer malfunction to prevent further damage and costly repairs. Here are some common indicators to watch for:
- No Heat: One of the most common issues encountered, if your dryer is running but not producing heat, it may indicate a faulty heating element or thermostat.
- Long Drying Times: If your clothes are coming out damp even after a full cycle, it may indicate airflow issues or a clogged lint trap.
- Unusual Noises: Grinding, squeaking, or thumping sounds can signal worn-out drum rollers or a malfunctioning motor.
- Electrical Issues: Flickering lights or a breaker that frequently trips can point to electrical problems that should be addressed immediately.
- Lint Build-Up: Excessive lint accumulation next to the dryer can indicate an obstruction in the exhaust venting, posing a fire hazard.
Common Issues Encountered in Dryer Repair
Understanding common specific issues can help when diagnosing your dryer’s performance problems. Here are the predominant challenges users face when dealing with dryer repair:
- Broken Drum Belt: If the drum isn’t spinning, the belt may have broken and needs replacement.
- Faulty Thermostat: A malfunctioning thermostat can lead to overheating or prevent the dryer from generating heat.
- Clogged Ventilation: A blocked venting system can restrict airflow, making drying cycles longer.
- Worn Roller Wheels: Drum roller wheels can become worn over time, resulting in noise and uneven spinning.
- Burnt Out Fuse: A blown thermal fuse can stop the dryer from running entirely, indicating a need for replacement.
Recommended Initial Troubleshooting Steps
Before diving into repairs, some preliminary troubleshooting steps can help you determine the source of the problem:
- Check Power Supply: Ensure the dryer is properly plugged in and that the outlet is functional.
- Inspect the Lint Filter: A clogged lint filter can significantly impede airflow, so clean it before attempting more complex repairs.
- Examine the Vent Hose: Look for kinks or blockages in the vent hose that could restrict airflow.
- Run a Reset: Unplug the dryer for a few minutes to see if it resolves minor electrical glitches.
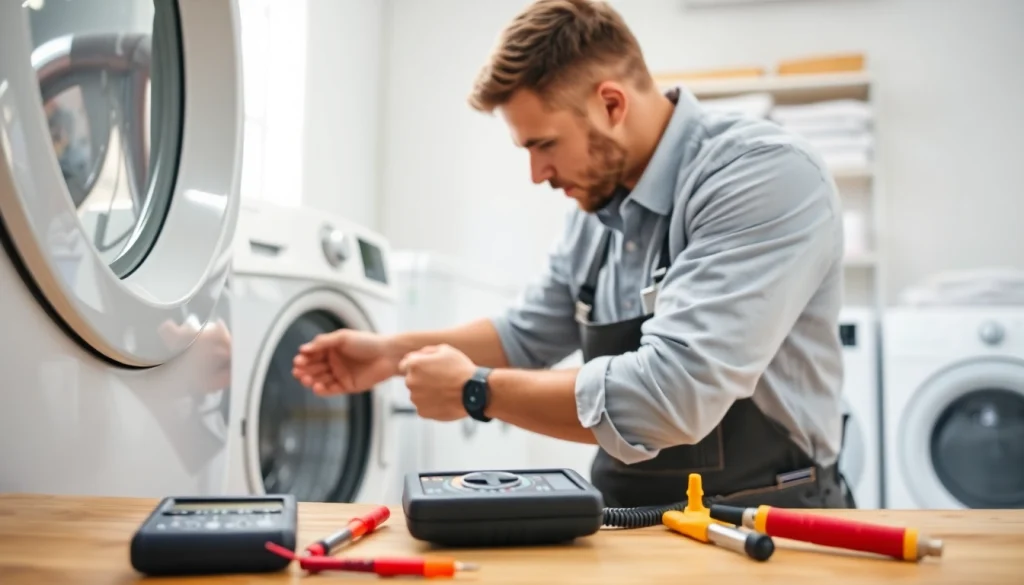
Tools and Safety for Successful Dryer Repair
Proper tools and safety guidelines are essential for a successful dryer repair. Understanding which tools you need, and how to use them safely, can help streamline your repair process.
Essential Tools for DIY Dryer Repair
Investing in the right tools can simplify your repair tasks. Here are some essential tools you’ll want to have on hand:
- Screwdrivers: Both Phillips and flat-head screwdrivers are essential for disassembling your dryer.
- Multimeter: A multimeter will help you measure electrical current and find faulty components.
- Pliers: Use pliers to firmly grip and pull out fasteners or stuck components.
- Socket Set: A set of sockets will provide the necessary torque to loosen and tighten bolts effectively.
- Vacuum Cleaner: To eliminate lint accumulation and prevent fire hazards, a vacuum cleaner with attachments will be beneficial.
Safety Precautions to Take During Repair
Safety should always be a priority when undertaking any home repairs. Here are critical safety precautions to keep in mind:
- Disconnect Power: Always unplug the dryer before starting any repair work to avoid electric shock.
- Wear Protective Gear: Safety goggles and gloves will protect you from debris and sharp edges.
- Proper Ventilation: Ensure good air circulation in your workspace to avoid inhalation of dust or fumes.
Understanding Electrical Safety Guidelines
Electrical components can be hazardous if mishandled. Follow these guidelines to ensure safe electrical procedures during your repairs:
- Know Your Appliance: Familiarize yourself with your dryer’s electrical specifications and understand the wiring setup.
- Use Non-Conductive Tools: Whenever possible, opt for insulated tools to protect against electric shocks.
- Check for Grounding: Ensure that the appliance is properly grounded to reduce the risk of electrical faults.
Step-by-Step Guide to Dryer Repair
To effectively address and resolve dryer issues, following a systematic step-by-step guide can help ensure you do not miss any critical details during your repair.
How to Disassemble Your Dryer Safely
Disassembling your dryer may seem overwhelming, but by following a straightforward approach, you can do it confidently:
- Remove the Lint Trap: Start by pulling out the lint trap to prevent it from getting in the way.
- Unplug the Dryer: As always, disconnect the power source to ensure safety.
- Locate and Remove Screws: Use your screwdriver to remove any screws that hold the top, back, and front panels together.
- Detach Wiring Connections: Take note of where wiring connections are attached, or take photos to help with reassembly.
- Lift Off Panels: Carefully lift off the panels, ensuring you do not force components that may be stuck.
Replacing Common Dryer Parts
Once you have disassembled your dryer, you may find it necessary to replace various parts. Here are some common components that often need replacement:
- Drum Belt: If your drum won’t spin, replacing the belt is often straightforward.
- Heating Element: For dryers that are not heating, you may need to swap out the heating element.
- Thermostat: A malfunctioning thermostat should be replaced to restore proper temperature control.
- Drum Rollers: Worn drum rollers can be replaced to eliminate noise and improve functionality.
Reassembling Your Dryer After Repair
Once you have completed the necessary replacements or repairs, reassembling your dryer correctly is vital:
- Re-attach Panels: Begin reattaching the dryer panels using the screws you previously removed.
- Reconnect Wiring: Make sure that all wiring connections match your prior documentation or photographs.
- Test Before Full Assembly: Before fully assembling, test the dryer to ensure all repairs were successful.
- Final Assembly: Complete the assembly and ensure that all screws are tightened securely.
Preventative Measures for Dryer Longevity
Maintaining your dryer through regular care can vastly extend its lifespan while improving its efficiency. Implementing these preventative measures can help you avoid costly repairs in the future.
Regular Maintenance Tips for Your Dryer
Some simple yet effective maintenance tips include:
- Clean the Lint Filter: After every load, clean the lint filter to prevent buildup and maintain airflow.
- Inspect Ventilation Systems: Regularly check the exhaust vent for blockages or damage.
- Lint Trap Cleaning: Periodically vacuum out the lint trap and exhaust duct to eliminate built-up debris.
Signs Your Dryer Needs Professional Maintenance
Sometimes, issues may arise that are beyond DIY repairs. Here are signs indicating it may be time to call in a professional:
- Persistent Issues: If you’ve attempted a repair but the problem persists, it may require expert assessment.
- Unusual Odors: A burning smell may indicate wiring issues that necessitate immediate expert attention.
- Frequent Breakdowns: Regular problems could suggest underlying issues that necessitate professional intervention.
Optimizing Dryer Performance for Energy Efficiency
Lastly, optimizing your dryer for energy efficiency is beneficial for cost savings as well as environmental concerns. Consider these tips:
- Dry Similar Fabrics Together: This prevents over-drying lightweight items and reduces energy use.
- Use Sensor Dry Settings: When available, utilize sensor drying to prevent over-drying and minimize energy consumption.
- Store Your Dryer Properly: If not in use, unplug or use energy-saver settings to conserve power.
When to Seek Professional Help for Dryer Repair
While many dryer issues can be addressed through DIY techniques, some circumstances call for professional expertise. Knowing when to seek help can save you time and potential hassle.
Evaluating the Severity of the Issue
When evaluating the severity of your dryer’s issues, consider:
- Complexity of Repair: If the repair involves significant disassembly or is beyond your skill level, it’s time to seek help.
- Cost of Parts: Sometimes the cost of new parts and repair labor may exceed the value of a new appliance.
- Nothing Works: If your troubleshooting has yielded no results, professional diagnostics may be needed.
Understanding Repair Costs and Considerations
Familiarizing yourself with the common costs associated with dryer repairs can help you make informed decisions:
- Diagnostic Fees: Many repair services charge a fee to assess the problem before making repairs.
- Parts and Labor: Costs can vary based on parts required and the labor charged by the technician, so it’s wise to request estimates in advance.
- Warranty Coverage: Check if your appliance is still under warranty, which might cover certain repairs free of charge.
Finding a Reliable Appliance Repair Service
When looking for a reliable appliance repair service, consider the following:
- Online Reviews: Research service providers and read reviews from customers to gauge reliability.
- Ask for References: Trusted friends or family may be able to recommend services they’ve had a positive experience with.
- Certifications: Look into the technician’s certifications or training to ensure you’re getting quality service.
You may also like
-
Expert Tips for Window Replacement Tigard Oregon: Enhance Your Home’s Efficiency and Aesthetics
-
Elevate Your Space: Innovative Approaches to Interior design
-
Elevate Your Space with the Timeless Beauty of Sheepskin Rug
-
Crafting Beautiful Spaces: Essential Insights into Interior design
-
Essential Home Gym Equipment for Every Fitness Enthusiast